
Recording problems in OBS are especially painful, because they are often discovered only after you have finished. You record for an hour, stop the recording, and then find that the file will not play, that the video stutters, that the audio is missing, or that the picture is black. The preview looked fine while you were recording, so the fault feels mysterious, but in most cases the preview and the recording take different paths through OBS. The preview shows what OBS is capturing; the recording shows what OBS was able to encode, write to disk, and store in a playable file. A problem in any of those later steps can ruin a recording while leaving the preview untouched. This guide follows the recording path step by step, output settings, disk space, encoder load, audio tracks, and file format, so you can find the step that failed.
Change one thing at a time and test after each change with a short recording, not with a long session you cannot afford to lose. Make test recordings of a minute or two, watch them back in full, and only then start a longer recording. The steps below are written for OBS Studio 33.0.1, released October 29, 2026, which is free and open-source software for Windows 10 and 11, macOS 13.0 or newer, and Linux, where support varies by distribution. Settings in this guide are starting points, not guarantees, because the right resolution, frame rate, bitrate, encoder and file format depend on your processor, graphics card, disk, and the content you are recording. Our guides to the best OBS recording settings and fixing OBS encoding overload explain the encoder choices in more depth.
Name the exact recording problem
The first step is to describe the problem precisely, because recording problems is a broad label for at least five different faults. Does the recording fail to start at all, with an error message when you press Start Recording? Does it start, but stop on its own part-way through? Does it finish, but the file is very small, very large, or missing entirely? Does the file exist and play, but the video stutters, freezes, or falls out of sync with the audio? Does the video play correctly but the audio is missing, quiet, or distorted? Does the audio play correctly but the video is black? Each of those symptoms points to a different part of the recording path, and the fix for one will not help another. Write the symptom down in a single sentence, for example: the recording finishes, the file plays, but the video freezes every few seconds while the audio continues. That sentence is the starting point for the rest of the guide.
Check the file before you change settings
Before you change anything in OBS, look at the recording file itself. Find it in the folder OBS is set to save to, and check its size and its length. A file of zero bytes, or a file that is far smaller than you would expect for its length, suggests the recording never really started or stopped very early. A file that is present but will not play in one media player may play in another, so try a second player before you conclude the file is damaged. Check the file name and the folder: if OBS is saving to a folder you did not expect, or to a removable drive that was disconnected, the file may be in a different place from where you looked. These checks take a few minutes, and they can save you from changing encoder settings to fix a file that was simply saved somewhere else.
Check where recordings are saved and whether space is free
OBS needs a place to write the recording, and it needs enough free space in that place to hold the whole file. Open OBS Settings, go to Output, and look at the recording path. Confirm that the folder exists, that it is on a drive with free space, and that your user account can write to it. A recording path that points to a folder that was deleted, renamed, or moved will cause the recording to fail. A path that points to a removable drive, a network drive, or a cloud-synced folder can cause problems too, because those locations can be slower, can disconnect, or can lock files while they sync. For testing, set the recording path to a folder on your main internal drive, with plenty of free space, and see whether the problem clears.
- Open Output settings and confirm the recording path exists and is writable.
- Check free space on that drive before a long recording.
- For a test, record to a folder on your main internal drive.
- Record for two minutes, check the file size and play it back in full.
- Only return to the usual drive after the test recording proves the setup works there.
Fix recordings that will not start or stop
When you press Start Recording and nothing happens, or an error message appears, read the message in full and copy it word for word. The message often names the cause, such as a recording path that does not exist, an encoder that failed to start, or a file that could not be created. Check the recording path first, as described above, and then check the encoder. If the encoder is set to a hardware encoder that is not available on your system, or to a software encoder with settings your system cannot sustain, the recording may fail to start. Try the other encoder as a test, with modest settings, and see whether the recording starts. Also check whether another program is already recording, or whether a previous OBS recording did not finish cleanly and left a file locked. Restart OBS, and if necessary restart the computer, and try again with a clean start.
Fix stuttering, freezing and out-of-sync recordings
A recording that stutters or freezes while the audio continues usually means the encoder or the graphics card could not keep up. The preview may have looked smooth while you were recording, because the preview and the recording use the system differently, and the encoder can fall behind even when the game feels smooth. Check the OBS status bar and log after a test recording for rendering lag and skipped frames, as described in our guides to fixing OBS lag and dropped frames and fixing OBS encoding overload. If those figures are high, lower the output resolution or the frame rate, choose a faster encoder preset, or try the hardware encoder if you were using the software encoder. Lower the game graphics settings and cap the game frame rate, and simplify the scene by removing browser sources and animated overlays for a test.
Fix recordings with no audio or black video
A recording with no audio, or with black video, is a different fault from a stuttering recording, and it needs a different check. If the recording has no audio, but the preview meters moved while you were recording, the problem is often in the audio tracks. OBS can record several tracks, and each source is assigned to one or more of them. If your microphone is assigned only to a track that your media player does not play, your voice will be missing from the playback even though the recording is complete. For a simple test, assign all sources to track 1, record again, and play the recording back in full. Our guide to fixing OBS no audio explains the mixer, monitoring, and track settings in detail.
Choose output, encoder and file format settings
Output settings decide how the recording is made, and a poor choice here can cause problems that look like hardware failures. In OBS Settings, under Output, you can choose the recording format, the encoder, the bitrate, and the quality settings. For the format, a common recommendation is to record to a format that can survive an interruption, such as MKV, and then remux it to MP4 afterwards using the remux option in OBS, rather than recording directly to MP4, which can become unplayable if OBS closes unexpectedly during the recording. That advice is about protecting the file, not about improving quality, and it is worth following if you have lost a recording to a crash before. Check the format you are using, and try the remux workflow as a test if your recordings have become unplayable after a crash.
- Set the recording path to a folder on your main internal drive with free space.
- Try recording to MKV and remuxing to MP4 afterwards, as a test.
- Try the hardware encoder, then the software encoder, and compare the results.
- Use moderate bitrate and quality settings, and adjust in small steps.
- Record a test, watch it back in full, and only then start a long recording.
A test recording routine that protects your work
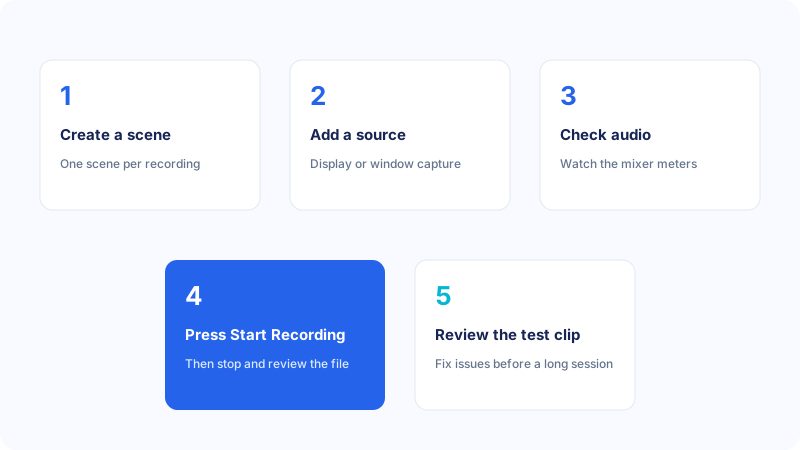
The best protection against recording problems is a routine you follow before every important session. Start with a two-minute test recording using the exact scene, game, and settings you intend to use. Play the test back in full, checking the picture, the sound, the sync, and the file size. Check the OBS log for rendering lag, skipped frames, and any warnings. If the test is good, start the real recording, and check the status bar from time to time during the session. If you are recording for a long time, consider stopping and starting a new recording at natural breaks, rather than making one very long file, because a shorter file is easier to check, easier to store, and less is lost if one file is damaged.
Common mistakes
The most common mistake is starting a long recording without a test, and discovering the problem only after the session is over. A second mistake is recording directly to MP4 on a drive that is nearly full, and losing the file when OBS closes unexpectedly. A third mistake is recording to a removable drive, a network drive, or a cloud-synced folder, and blaming OBS for stutter that is caused by the drive. A fourth mistake is setting the bitrate to the maximum available, and overloading the encoder and the disk. A fifth mistake is changing the resolution, the encoder, the bitrate, and the recording path all at once, and not knowing which change helped. A sixth mistake is checking only the first minute of a test recording, and missing stutter or drift that appears later. Avoiding these mistakes will not make every recording perfect, because the right settings depend on your hardware and your content, but it will protect most of your work and make the remaining problems much easier to diagnose.
Troubleshooting
If the recording will not start, check the recording path, the free space, and the encoder, and read any error message in full. If the recording stops part-way through, check the free space and the drive speed, and test with a shorter recording to an internal drive. If the recording stutters or freezes, check the log for rendering lag and skipped frames, and lower the resolution, frame rate, or game settings. If the audio drifts out of sync, test with a long recording at lower settings, and check the audio track assignments. If the recording has no audio, assign all sources to track 1 and test again, and see our guide to fixing OBS no audio. If the recording is black, check whether the preview was also black, and see our guide to fixing an OBS black screen. If the file will not play, try a second media player, and consider recording to MKV and remuxing to MP4 in future. If nothing here resolves the problem, keep your notes about the symptom, the settings, the file size, and the log figures, and ask for help on the official OBS help pages.
Frequently asked questions
Why does my OBS recording have no sound?
The meters may have moved, but the sources may be assigned to an audio track your player does not play. Assign all sources to track 1 for a simple test, record again, and play the recording back in full. Also check that no source is muted in the mixer.
Why is my OBS recording black but the preview looked fine?
A black recording with a normal preview points to the output or encoder, rather than the capture. Try a different encoder, a lower resolution, and a different file format as separate tests, and play the test recordings in a second media player.
Should I record to MP4 or MKV in OBS?
Many users record to MKV and then remux to MP4 afterwards, because an MKV file is more likely to survive if OBS closes unexpectedly during a recording. A direct MP4 recording can become unplayable if it is interrupted. Use the remux option in OBS to convert the finished file.
Why does my recording stop part-way through?
The disk may have filled up, or the drive may be too slow to keep up with the recording. Check the free space, record to a fast internal drive for a test, and avoid recording to removable, network, or cloud-synced folders.
Why does my recording stutter even though the game feels smooth?
The game and the encoder compete for the same processor and graphics card, and the game may feel smooth while the encoder falls behind. Lower the output resolution or frame rate, try the hardware encoder, and check the log for rendering lag and skipped frames.
Conclusion
Recording problems in OBS usually have a specific cause in the recording path: the output folder, the disk space, the encoder load, the audio tracks, or the file format. Name the exact symptom first, check the file and the recording path, and then work through the encoder and output settings one change at a time, testing with short recordings that you watch back in full. Use a test routine before every important session, record to a reliable drive with free space, and consider recording to MKV and remuxing to MP4 to protect the file. The stable settings you find may be lower than the maximum values on offer, but a smooth, playable recording at those settings is worth more than a stuttering or unplayable one at higher settings. If the problem persists, your notes about the symptom, the settings, the file size, and the log figures will make any further help much faster. For more detail, see our guides on the best OBS recording settings and OBS settings for a low-end PC.