
Audio is the part of a recording that viewers notice first and forgive least. A video with a slightly soft picture but a clear, well-balanced voice is perfectly watchable; a video with a sharp picture and a distant, echoey, distorted voice is not. That is why audio deserves its own guide, even though OBS is usually described as a video tool. OBS Studio is free and open-source software, the latest version is 33.0.1, released on October 29, 2026, and its audio tools are far stronger than most beginners expect: it can capture a microphone and the sound from your computer at the same time, show live level meters for each, apply filters that remove hum and even out volume, and save each audio source on its own track so you can fix the balance later. This guide explains how all of that works, from choosing and placing a microphone to exporting a finished recording with clean, balanced sound.
How OBS handles audio
OBS Studio handles audio in three stages: capture, mixing and output. Capture is where sound enters OBS, from a microphone, from your computer's speakers or headphones, or from a specific application. Mixing is where the Audio Mixer combines those inputs, letting you set the volume of each one, mute one without affecting the others, and apply filters. Output is where the mixed sound is saved into your recording or sent to a stream, either combined into one track or kept on separate tracks. Understanding those three stages helps you find problems: a silent recording can be a capture problem (the wrong device), a mixing problem (a muted channel) or an output problem (the track was not enabled), and each stage has a different fix.
Audio in OBS is also tied to scenes in a way that surprises beginners. Some audio sources are global, set in Settings, then Audio, they are available in every scene, while others are added as sources inside a particular scene and only exist there. A microphone added in Settings is global and follows you across scenes, which is usually what you want for commentary. A microphone added as an Audio Input Capture source belongs to one scene, which is useful when different scenes need different microphones, but it also means switching scenes can silence your voice if the new scene has no microphone. The safest approach for beginners is to set the microphone once in Settings and not add it again as a source, so it is present everywhere. The same rule applies to desktop audio: set it once in Settings, and it works in every scene.
For every option on the Audio settings page, including tracks and monitoring, see our guide to OBS audio settings.
Microphone and desktop audio basics
There are two kinds of audio most OBS recordings need: your voice, and the sound from the computer. Your voice comes from a microphone, and the sound from the computer, a game, a video, a music app, a browser, comes through the Desktop Audio device. Those two are independent: you can record your voice without the computer sound, the computer sound without your voice, or both together, and you can set the volume of each separately. That independence is what makes separate tracks possible, and it is also what makes the commonest audio mistake possible: recording with one of the two missing and only discovering it afterwards, because the other one sounded fine during the session.
Microphones come in several forms, and the choice matters more than any OBS setting. A USB microphone on the desk is the most common starting point for creators: it sits close to your mouth, is designed for voice, and needs no extra equipment. A headset microphone is convenient and stays at a fixed distance from your mouth, which keeps the volume steady, but it can pick up breathing if it sits too close. A lavalier microphone clipped to your shirt is discreet and keeps a steady distance while you move. The microphone built into a laptop or a webcam is the weakest option: it sits far from your mouth, picks up the room and the keyboard, and sounds distant. Whichever you use, the rule is the same, the microphone should be close to your mouth, roughly a hand's width away, and pointed at you, not at the keyboard or the speakers.
Adding and configuring your microphone
Connect your microphone before opening OBS, so the program sees it when it starts. Then open Settings, then Audio, and choose the microphone in the Mic/Auxiliary Audio list. Speak at your normal volume and watch the meter next to it in the Audio Mixer: it should move into the green and yellow as you speak. If it does not move, the wrong device is selected, the microphone is muted on the device itself, or another program is using it exclusively. Check the device's own mute button or switch first, many USB microphones and headsets have one, then try the next device in the list. Do not add the same microphone again as an Audio Input Capture source in a scene: that captures it twice, and the result sounds doubled and echoey, which is one of the most confusing problems beginners meet.
Microphone placement also matters for face-to-camera videos, as covered in our guide to recording webcam with OBS.
Capturing system and desktop audio
Desktop audio is configured in Settings, then Audio, under Desktop Audio. Choose the output device you actually listen through, usually your speakers or headphones, and play something: a video, a game, a song. The Desktop Audio meter in the mixer should move with the sound. If it does not, the wrong device is selected, the application is sending sound to a different output, or the volume is muted in the operating system. On Windows, each application can send sound to a different output device, so check the application's own audio settings as well as the system volume. On macOS, capturing desktop audio has historically needed extra steps: OBS on macOS may need a virtual audio device or a specific capture method to hear application sound, and the exact method depends on your macOS version, so check the official OBS help pages for the current macOS audio guidance rather than guessing.
The Audio Mixer, levels and filters
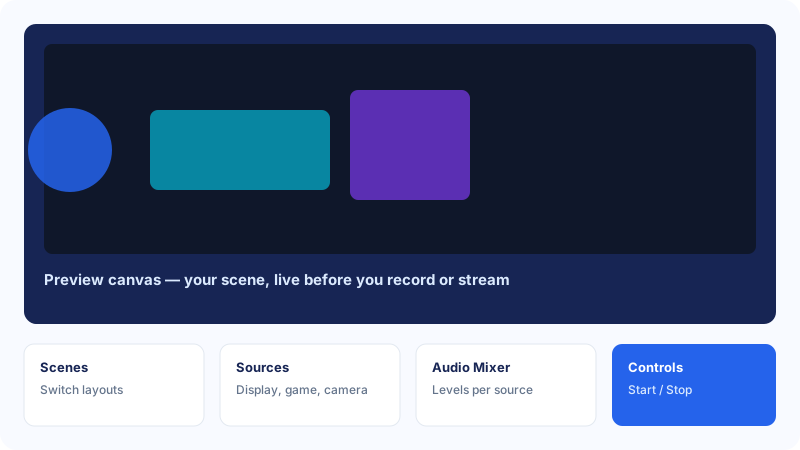
The Audio Mixer sits to the right of the preview in the main OBS window, and it is the panel you will watch most while recording. Each audio source gets a channel with a live meter, a volume slider, a mute button and a settings gear. The meter shows the loudness in real time: green is quiet, yellow is a healthy speaking level, and red means the sound is clipping, distorting, and cannot be fixed afterwards. The goal for a microphone is to peak in the yellow during normal speech, with occasional touches of the top of the yellow on loud words, and never to sit in the red. If the meter barely moves, the microphone is too far away or its level is too low; if it is pinned in the red, it is too close or too loud. Fix distance first, then the slider, because a microphone far away and turned up loud amplifies room noise along with your voice.
Recording audio-only and separate tracks
OBS is a video recorder, so there is no "audio-only" button, but you can still produce an audio-only result in two practical ways. The first is to record normally with a video source and then extract the audio afterwards in an editor or a conversion tool; the video can be as simple as a black screen or a still image, and the audio is what matters. The second is to record with a scene that contains only audio sources and a static image, which produces a small video file whose soundtrack is your recording. Either way, the audio settings are the same: a good microphone, correct levels, and the right format. If your goal is a podcast or a voiceover, the second method is tidy, because the finished file already looks like a finished episode when you add a cover image as the picture. Remember that OBS always saves a video file, so "audio-only" in OBS means a video file you take the audio from, not a standalone audio file.
Game audio balance is covered in context in our guide to recording gameplay with OBS, and the best OBS recording settings guide explains the output settings that interact with audio tracks.
Exporting and checking your audio quality
When you click Stop Recording, OBS saves a video file containing your audio to the Recording Path in Settings, then Output. The first check is simple: open the file in a video player, put on headphones, and listen to the beginning, the middle and the end. Listen for clarity, can you understand every word without straining?, for balance, is your voice louder than the game or application sound?, for noise, hum, hiss, echo, keyboard clicks, and for sync, because audio that drifts away from the picture is distracting even when the sound itself is good. If you recorded separate tracks, open the file in your editor and check that each track contains what you expect; a track that is silent tells you the routing was wrong, and it is better to learn that from a test than from an important session.
Common mistakes
The most common audio mistake is a muted microphone: the mixer mute button, the microphone's own mute switch, or the operating system's mute can all silence a recording, and the video looks perfect until you play it back. Always speak a test sentence and watch the meter before recording. The second is adding the same microphone twice, once in Settings and once as a source, which creates a doubled, echoey voice. Third, recording with the microphone too far away and turning the volume up to compensate, which amplifies room noise along with the voice. Fourth, letting desktop audio drown out the voice, because the game or application volume was never lowered. Fifth, monitoring audio through speakers, which creates feedback or echo. Sixth, using mismatched sample rates that cause audio to drift out of sync with video. Seventh, adding every filter at maximum strength, which makes a voice sound robotic. And finally, skipping the test recording, ten seconds of listening saves a full session recorded silent, distorted or out of sync.
Troubleshooting
If the recording has no sound at all, work through the chain in order: is the microphone meter moving in the mixer, is the channel muted, is the right device selected in Settings, then Audio, and is the microphone's own mute switch off? If the microphone works in another app but not in OBS, check that the other app is not holding it exclusively, and restart OBS. If the recording has your voice but no game or application sound, check the Desktop Audio meter, the device selected in Settings, and whether the application is sending sound to the output OBS is capturing; on macOS, desktop audio may need a virtual audio device, as noted earlier. If the voice sounds doubled, the microphone is added twice, remove one. If the audio is distorted, the level was too high; lower it and re-record, because distortion cannot be repaired. If the audio drifts out of sync, reduce the system load and keep the sample rate at 48 kHz, and check that no other program is changing the device's sample rate.
Frequently asked questions
Can OBS record audio only, without video?
OBS always saves a video file, so there is no audio-only recording button. The practical approach is to record with a static image or a black screen as the picture, then extract the audio track afterwards in your editor or a media tool. Set up the microphone and levels exactly as you would for a video recording.
Why does OBS record video but no audio?
A silent recording usually means the microphone or desktop audio is muted in the mixer, the wrong device is selected in Settings, then Audio, or the microphone's own mute switch is on. Speak a test sentence and watch the meters before recording, and check the track settings in Advanced Audio Properties.
How do I record my microphone and game audio on separate tracks?
Enable the tracks you want in Settings, then Output, then Audio, and in the Audio Mixer open Advanced Audio Properties for each channel and tick the tracks it should be recorded to. Keep one track with everything mixed together so the file plays normally, and use the separate tracks in your editor.
Why does my voice sound doubled or echoey in OBS?
A doubled voice usually means the same microphone is added twice, once in Settings, then Audio, and once as an Audio Input Capture source in a scene. Remove one of them. An echo can also come from speakers leaking into the microphone, so wear headphones while recording.
What audio filters should I use for voice in OBS?
Start with none, and add filters only if a test recording shows a problem. Noise Suppression helps with steady hum, a Noise Gate silences the microphone between sentences, and a Compressor evens out loud and quiet moments. Add one at a time, test after each, and keep the processing light so the voice stays natural.
Conclusion
Good audio in OBS is a short routine: put a decent microphone close to your mouth in a quiet room, select it once in Settings, set desktop audio to the output you actually use, and check both meters in the Audio Mixer before you press record. Keep your voice louder than the computer sound, add filters one at a time only if a test shows a problem, and record your microphone and desktop audio on separate tracks so the balance can be fixed in the edit. Listen to a ten-second test through headphones before every session, and listen to the finished recording on a second device before you share it. The picture may be what viewers look at, but the sound is what keeps them watching, and with the mixer, the meters and the test routine, clean audio in OBS is a habit, not a mystery.