
Bitrate is the single OBS setting that most often decides whether a live stream runs smoothly or keeps buffering, yet it is also the one beginners understand least. In simple terms, bitrate is how much data your stream sends every second, measured in kilobits per second, and it controls the trade-off at the heart of every broadcast: send too little, and the picture looks blocky; send too much, and your connection cannot keep up, so viewers see buffering and dropped frames. This guide explains what bitrate means, where to change it in OBS Studio 33.0.1, what starting-point ranges to try for common resolutions, and how to test a value your own connection can sustain. Every number here is a starting point, not a mandate or a guarantee: the right bitrate depends on your hardware, your encoder, your upload speed, your content and your platform, and the only way to know a value works for you is to test it.
What Bitrate Means in OBS
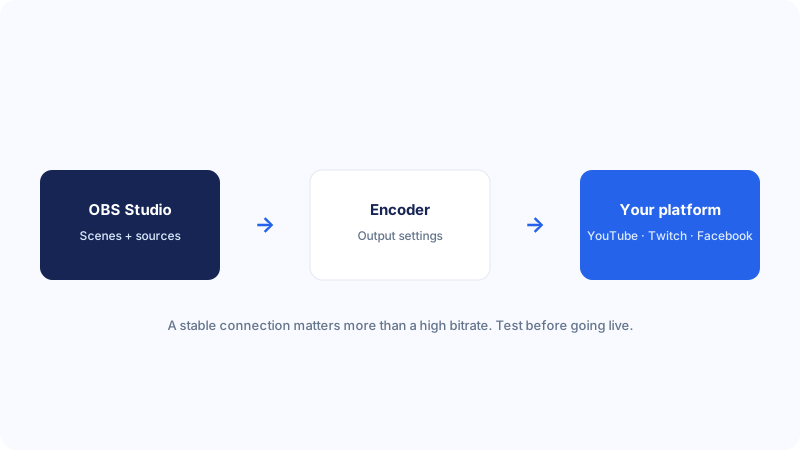
When OBS streams, it compresses each frame of video and sends the result to your platform, and the bitrate sets how much data it is allowed to use for that job each second. A higher bitrate gives the encoder more data to describe each frame, so the picture can show more detail and handle motion more cleanly, but it also demands more from your upload connection for the whole broadcast. A lower bitrate is easier to send, but the encoder has to discard more detail, so fast motion turns blocky, fine text blurs, and smooth gradients show banding. The key point is that bitrate and resolution work together: a high resolution with a low bitrate looks worse than a lower resolution with the same bitrate, because the available data is spread across more pixels. That is why raising the resolution without raising the bitrate is one of the most common mistakes in streaming.
Where to Change the Bitrate in OBS
In OBS, the streaming bitrate lives in Settings, then Output. If the output mode is set to Simple, you will see a single bitrate field for streaming, which is the easiest place to start: type the value you want, in kilobits per second, and click OK. If the output mode is set to Advanced, the streaming bitrate is under the Streaming tab, where you can also choose the rate-control method, constant bitrate, known as CBR, is the usual choice for live streaming, because it keeps the data rate steady, which platforms and viewers’ connections handle more predictably than a rate that swings up and down. In Advanced mode you can also set a separate bitrate for recording, which is useful if you record locally at a higher quality than you stream. Our best streaming settings guide explains how bitrate fits with resolution, frame rate and the encoder.
Bitrate Starting Points by Resolution
Use the ranges below as starting points, and adapt them to your upload speed, your encoder and your content, as explained in the next two sections. For 720p at 30 frames per second, a common starting point is 2,500 to 4,500 kilobits per second for video, which suits talks, slides, creative work and slower games on a modest connection. For 720p at 60 frames per second, start a little higher, in the region of 3,500 to 5,000 kilobits per second, because the extra frames need extra data. For 1080p at 30 frames per second, a common starting point is 4,500 to 6,000 kilobits per second, and for 1080p at 60 frames per second, start in the region of 6,000 to 8,000, but only if your upload speed comfortably supports it. For a very slow connection, 480p at 30 frames per second with 1,000 to 2,000 kilobits per second can still give viewers a watchable stream. Add 128 or 160 kilobits per second for audio on top of the video figure. Remember that platforms may have their own guidance and limits, so check your platform’s current guidance as well, and treat these ranges as a place to start testing, not as values a platform mandates.
How Your Upload Speed Limits Your Bitrate
Your upload speed is the hard limit on your bitrate: you cannot sustainably send more data than your connection can carry, and trying to do so is the most common cause of buffering and dropped frames. Before choosing a bitrate, measure your upload speed with a speed test, ideally at the time of day you usually stream and on the connection you will use, and repeat the test a few times, because the result varies. A useful rule is to keep your total bitrate, video plus audio, comfortably below your measured upload speed, leaving headroom for the connection to vary and for other devices on the same network. A wired Ethernet connection is usually more stable than Wi-Fi, and closing other apps that upload data, cloud backups, file syncing, video calls, frees up capacity for the stream. If your upload speed is low, lower the resolution before you lower the bitrate below the ranges in section 3, so the picture stays clean at a smaller size.
How Content, Encoder and Frame Rate Change the Bitrate You Need
The same resolution needs a very different bitrate depending on what is on screen. A static slide presentation or a talking head changes little from frame to frame, so the encoder can describe it with relatively little data, and a modest bitrate looks clean. A fast game, a sports broadcast or a camera panning across a busy scene changes almost every pixel in every frame, so the encoder needs far more data to avoid blockiness, and the same bitrate that looked fine for a talk will look rough for a game. Frame rate matters for the same reason: 60 frames per second sends twice as many frames as 30, so it needs more bitrate to keep each frame looking as good. The encoder matters too: a hardware encoder such as NVENC on a supported NVIDIA card, Quick Sync on a supported Intel processor, or the Apple hardware encoder on a Mac compresses video differently from software encoding, so the same bitrate can look slightly better or worse depending on the encoder, and the only way to compare is to test both on your own computer. When in doubt, test with your actual content, a real game, a real slide deck, not with a still image.
Test Your Bitrate Before Going Live
Testing is how you turn a starting-point range into a value you can trust. Run a test stream for at least ten minutes, using your real content at the resolution, frame rate and bitrate you plan to use, and watch it on another device while OBS is streaming. Check that the picture stays clean during fast motion, that the sound is clear, and that the stream does not buffer. Watch the OBS status bar at the bottom of the window, which shows the current bitrate and the percentage of dropped frames: a small number of dropped frames at the very start can be normal while the connection settles, but a steadily rising percentage means the bitrate is too high for your upload speed, and you should lower it. If the picture looks blocky during motion but the dropped-frames figure stays near zero, the connection is coping and the bitrate is simply too low for the content, so raise it a little or lower the resolution. Change only one setting at a time, test again, and note the value that passed. For the wider setup around bitrate, see our live streaming setup guide.
Adjust Bitrate During and After a Stream
Once you are live, the best approach is usually to leave the bitrate alone, because changing it mid-stream can interrupt the broadcast and rarely fixes the underlying problem as cleanly as a planned change before the next stream. If viewers report buffering during a live broadcast, first check the OBS status bar: if dropped frames are rising, the connection is struggling, and the safest immediate step is to keep the stream running and note the problem, rather than changing settings in a panic. After the stream, review the recording, especially the busiest moments, and ask whether the picture stayed clean or turned blocky. If it turned blocky, raise the bitrate a little for the next stream, or lower the resolution; if it buffered, lower the bitrate. Save the value that works as a named OBS profile for that type of content, so you do not have to rediscover it each time, and re-test whenever you change hardware, location or connection.
- Measure your upload speed at the time you usually stream, and repeat the test a few times.
- Pick a starting-point bitrate from section 3 for your resolution and frame rate.
- Keep the total bitrate comfortably below your measured upload speed.
- Run a ten-minute test stream with your real content and watch it on another device.
- Lower the bitrate if dropped frames rise; raise it a little if the picture turns blocky.
Common mistakes
The most common mistake is setting the bitrate higher than the upload connection can sustain, because a bigger number feels like better quality, when in fact it causes buffering and dropped frames that make the stream worse. The second is raising the resolution without raising the bitrate, so a 1080p stream looks blockier than a 720p stream at the same bitrate. The third is copying someone else’s bitrate exactly, even though their upload speed, encoder and content are different from yours. The fourth is choosing a bitrate from a single speed test taken at a quiet time of day, when the connection is at its best, rather than testing at streaming time. A fifth is using variable bitrate for live streaming when constant bitrate would be steadier. A sixth is testing with a still image or an empty scene, which needs far less bitrate than real content, and then being surprised when the real stream struggles. Finally, many streamers change the bitrate, the resolution and the frame rate all at once after a bad stream, so they never learn which change actually helped. Change one thing, test it, and keep notes.
Troubleshooting
If viewers see buffering and the dropped-frames figure in OBS keeps rising, lower the video bitrate in steps, for example, by 500 to 1,000 kilobits per second at a time, and test on a wired connection if possible, closing other apps that upload data. If the picture looks blocky during motion but dropped frames stay near zero, the connection is coping and the bitrate is too low for the content, so raise it a little or lower the output resolution so the available bitrate goes further. If OBS reports an overloaded encoder, lower the output resolution, drop the frame rate to 30, or switch to a hardware encoder if your computer supports one; our guide to fixing the encoding overloaded error covers this in detail. If the stream disconnects repeatedly, check your connection, try a lower bitrate, and check your platform’s stream health information. If the bitrate in OBS jumps up and down, check that the rate control is set to constant bitrate, and that no other program is competing for upload bandwidth. For lag and dropped frames, see our guide to fixing lag and dropped frames in OBS.
Frequently asked questions
What bitrate should I use for 1080p streaming in OBS?
As a starting point, many streamers use 4,500 to 6,000 kilobits per second for 1080p at 30 frames per second, and more for 60 frames per second or fast-moving content. The right value depends on your upload speed, your encoder and your content, so start in that range, run a ten-minute test stream, and lower the bitrate if dropped frames rise or raise it a little if the picture turns blocky.
What bitrate should I use for 720p streaming in OBS?
As a starting point, 2,500 to 4,500 kilobits per second for 720p at 30 frames per second suits most talks, slides and slower games, with a little more for 60 frames per second. 720p is a sensible choice on a modest connection, because it needs less bitrate than 1080p and still looks clean on phones and laptops. Test it with your real content before relying on it.
Does a higher bitrate always mean better quality?
No. A higher bitrate gives the encoder more data to describe each frame, so it can look better, but only if your upload connection can sustain it. If the bitrate is higher than your connection can carry, the stream drops frames and viewers see buffering, which is worse than a slightly softer picture at a lower, stable bitrate. The best bitrate is the highest one your connection can sustain reliably.
Should I use CBR or VBR for streaming?
Constant bitrate, or CBR, is the usual choice for live streaming, because it keeps the data rate steady, which platforms and viewers’ connections handle more predictably. Variable bitrate, or VBR, lets the rate rise and fall with the complexity of the picture, which can suit recording, but for live streaming the steady rate of CBR is generally easier to sustain and to diagnose when something goes wrong.
Why does OBS show dropped frames when my bitrate looks right?
Dropped frames usually mean the connection cannot carry the bitrate at that moment, even if a speed test looked fine, because upload speed varies with the time of day, other devices on the network and the route to the platform. Lower the bitrate in steps, use a wired connection if possible, close other apps that upload data, and test at the time you usually stream. If the problem persists, see our guide to fixing lag and dropped frames.
Conclusion
Configuring OBS bitrate is a balance, not a single magic number: send enough data for a clean picture, but not so much that your connection cannot keep up. Start with the ranges in this guide for your resolution and frame rate, keep the total bitrate comfortably below your measured upload speed, and test for at least ten minutes with your real content before you go live. If dropped frames rise, lower the bitrate; if the picture turns blocky during motion, raise it a little or lower the resolution. Change one setting at a time, save the values that work as named OBS profiles for different kinds of content, and re-test whenever your hardware, location or connection changes. With that habit, bitrate stops being a guess and becomes a setting you have verified, and a stable, clean stream is the result viewers actually notice, far more than any single number on a settings screen.