Every guide to the “best” OBS streaming settings gives different numbers, and that is not a mistake: the best settings depend on your computer, your upload speed, your platform and what you are streaming. A fast game needs more than a slide presentation, a strong fibre connection supports more than a shared mobile connection, and a powerful computer encodes more easily than an older laptop. This guide explains how the main settings work, gives sensible starting points you can adapt, and shows you how to test them, using OBS Studio 33.0.1 on Windows 10 or 11, macOS 13.0 or newer, or a supported Linux distribution. Treat every number here as a starting point, not a guarantee: results depend on your hardware, your encoder, your connection and your platform, and the only way to know a setting works for you is a test stream. For the full setup around these settings, see our live streaming setup guide.
What Makes a Good Streaming Setup
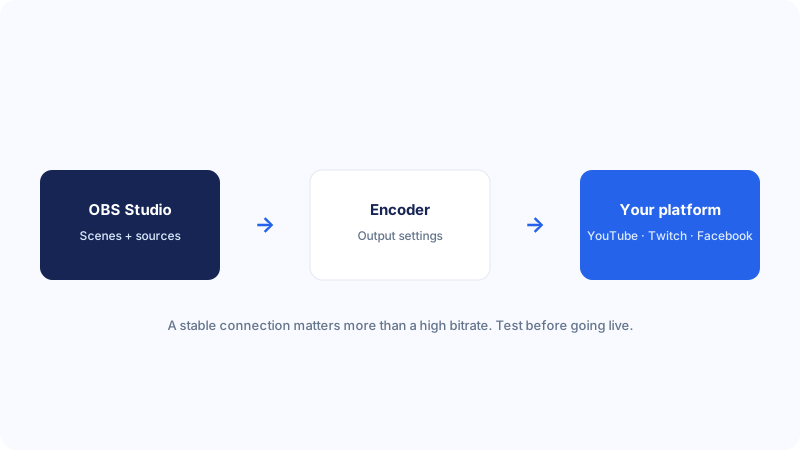
A good streaming setup is a balance between three things: picture quality, smoothness and stability. Picture quality comes mostly from resolution and bitrate; smoothness comes from frame rate and a steady encoder; stability comes from staying well inside what your upload connection and your computer can sustain for the whole broadcast. If any one of the three is pushed too far, the others suffer: a very high resolution with too little bitrate looks blocky, a high frame rate on a weak computer stutters, and a bitrate above your upload speed causes dropped frames and buffering for viewers. The aim is therefore not the highest numbers, but the highest numbers that stay stable for an hour or more. Start modestly, test, and raise one setting at a time, watching the OBS status bar for dropped frames and encoder warnings. Keep a note of the settings that worked, and remember that a stream that runs smoothly at 720p is a better experience than a 1080p stream that keeps freezing.
Video Settings: Resolution and Frame Rate
In Settings, then Video, you will see two resolutions: the base canvas, which is the size of your OBS scene, and the output resolution, which is the size of the video sent to the platform. A common starting point is a base canvas of 1920 by 1080, matching a typical screen, with an output of 1280 by 720, which is reliable on modest connections and still looks clean on phones and laptops. If your computer and connection cope comfortably, you can try an output of 1920 by 1080, but only after a test stream stays smooth. For frame rate, 30 frames per second suits talks, slides, creative work and casual streams, where little moves quickly, while 60 frames per second suits fast-moving games, where smooth motion matters and viewers notice stutter. Higher frame rates need more encoding work and more bandwidth, so do not choose 60 simply because it is available. Test the layout by recording a short clip and watching it on a phone, since many viewers watch on mobile and small text that looks fine on a monitor can be unreadable there.
Output Settings and the Encoder
In Settings, then Output, choose Simple mode if you are new to OBS, or Advanced mode if you want separate control over the streaming encoder and the recording encoder. The encoder is the part of OBS that compresses your video so it can be sent live, and the choice matters: a hardware encoder, NVENC on a supported NVIDIA graphics card, Quick Sync on a supported Intel processor, or the Apple hardware encoder on a Mac, usually gives smoother results with less load on the processor than software encoding, because the work is done by dedicated hardware. Software encoding, using the x264 encoder, can look very good on a powerful processor, but it competes with your game and other programs for the same processor, so it is more likely to struggle on a modest computer. There is no universally best encoder; the right choice depends on your hardware, so try the hardware option first if your computer supports one, test it, and only switch if the result is worse. If OBS reports an overloaded encoder, see our guide to fixing the encoding overloaded error.
Bitrate and Audio Settings
Bitrate is how much data your stream sends each second, measured in kilobits per second, and it is the setting most directly limited by your upload speed. As a starting point, many streamers use around 2,500 to 4,500 kilobits per second for 720p at 30 frames per second, and around 4,500 to 6,000 for 1080p at 30 frames per second, with higher values for 60 frames per second or fast-moving content, but these are starting points, not platform mandates, and the right value depends on your upload speed, your encoder and how much motion your content contains. A useful rule is to keep your total bitrate comfortably below your measured upload speed, leaving headroom for the connection to vary, and to lower the bitrate before raising the resolution if a stream buffers. Our OBS bitrate guide covers this in more depth, with examples for different resolutions. For audio, set the sample rate to 48 kHz in Settings, then Audio, and use 128 or 160 kilobits per second for the stream; that is enough for clear speech and music, and audio uses only a small share of your total bitrate.
Settings by Type of Content
Different content needs different settings, so it helps to think in terms of a few starting profiles rather than one setup for everything. For a talk, interview or slide presentation, 720p at 30 frames per second with a modest bitrate is usually enough, because the picture changes slowly and viewers care most about clear speech and readable slides. For a creative stream, such as drawing or music, the same resolution works well, but keep the camera and the work area large and well lit, since detail matters more than motion. For a slow or casual game, 720p at 30 frames per second is a sensible start, moving to 60 frames per second only if the game feels choppy. For a fast competitive game, 1080p at 60 frames per second can look impressive, but only if your hardware and upload speed sustain it, if either struggles, 720p at 60 frames per second is a better compromise than 1080p at 30, because smooth motion matters more than extra pixels in fast play. Save each profile in OBS, as described in section 7, so you can switch without re-entering numbers.
Settings for Slow Connections and Modest Hardware
If your upload speed is limited or your computer is older, the right settings are lower, and that is not a failure, a stable low-resolution stream is far better than an ambitious one that keeps freezing. Start at 1280 by 720 at 30 frames per second, or even 854 by 480 at 30 frames per second if the connection is very slow, with a bitrate in the lower part of the ranges in section 4, and use a hardware encoder if your computer supports one, since it reduces the load on the processor. Close unnecessary programs before streaming, especially anything that downloads, uploads or renders in the background, plug a laptop in, and use a wired Ethernet connection rather than Wi-Fi if you can, because a wired link is usually more stable. Lower the output resolution before lowering the frame rate if the picture looks blocky, and lower the frame rate before lowering the resolution if the motion stutters. Test for at least ten minutes, because a setting that works for two minutes can still struggle as the computer warms up or the connection varies, and keep the settings that pass that longer test.
Save Profiles and Test Before Going Live
OBS lets you save different profiles, named sets of settings, so a gaming stream and a talk do not have to share one compromise setup. In OBS, use the Profile menu to create a new profile, give it a clear name such as “720p Talk” or “1080p Game”, and set the video, output and audio options for that kind of broadcast. Switch profiles before you start streaming, and check the settings are the ones you expect, because it is easy to go live on the wrong profile after a change. Before any public broadcast, run a short test stream and watch it on another device, checking that the picture is the right size, the sound is clear, and the stream does not buffer or drop frames. Watch the OBS status bar, which shows the bitrate and the percentage of dropped frames, and note the settings that worked. If you change one setting, test again, and change only one thing at a time, so you know which change helped or hurt. That discipline is what turns a set of starting points into settings you can trust.
- Start at 720p, 30 frames per second, with a modest bitrate and a hardware encoder if available.
- Run a test stream for at least ten minutes and watch it on another device.
- If it is smooth, raise one setting, resolution, frame rate or bitrate, and test again.
- If it buffers or the encoder overloads, lower the bitrate or resolution first.
- Save the settings that pass as a named OBS profile for that type of content.
Common mistakes
The most common mistake is setting every value to its highest option, the highest resolution, frame rate and bitrate, and hoping for the best, when a modest, stable stream would have looked better. The second is copying someone else’s settings exactly, even though their computer, connection and content are different from yours. A third is raising the resolution without raising the bitrate, which makes the picture look blocky rather than sharper. A fourth is choosing 60 frames per second for a talk or a slide deck, wasting encoding effort and bandwidth on motion that is not there. A fifth is using software encoding on a modest processor while also running a demanding game, then wondering why the stream stutters. A sixth is never testing, so the first sign of a problem is viewers complaining in chat. Finally, many streamers change several settings at once after a bad stream, so they never learn which change actually helped. Change one thing, test it, and keep notes.
Troubleshooting
If viewers see buffering, lower the video bitrate and the output resolution in steps, use a wired connection if possible, and close other apps that upload data; check the dropped-frames figure in the OBS status bar, because a steadily rising percentage means the stream is sending more data than the connection can carry. If OBS reports an overloaded encoder, lower the output resolution, drop the frame rate to 30, or switch to a hardware encoder if your computer supports one. If the picture looks blocky or blurry, raise the bitrate a little, or lower the resolution so the available bitrate goes further, do not raise the resolution first. If motion looks choppy, raise the frame rate to 60 only if your hardware and connection cope, or lower the resolution to free up encoding capacity. If there is no audio, check the microphone in the Audio Mixer and the correct device in Settings, then Audio. For lag and dropped frames, see our guide to fixing lag and dropped frames in OBS, and for recording settings, see our recording settings guide.
Frequently asked questions
What are the best OBS settings for streaming?
There is no single best setup, because the right settings depend on your hardware, upload speed, platform and content. A good starting point for most people is 720p at 30 frames per second, a hardware encoder if available, and a bitrate in the ranges given in section 4. Test that setup, and raise one setting at a time only if the test stream stays smooth.
Should I stream in 1080p or 720p?
Start with 720p unless you have tested 1080p and it stays smooth. 720p looks clean on phones and laptops, uses less bandwidth, and is kinder to modest computers and connections. Move to 1080p only after a test stream at that resolution shows few dropped frames and no encoder warnings, and only if your upload speed comfortably supports the higher bitrate it needs.
Is 60 frames per second better than 30?
For fast-moving games, yes, 60 frames per second makes motion look smoother. For talks, slides and creative streams, 30 is usually enough, and 60 wastes encoding effort and bandwidth on motion that is not there. Choose the frame rate for your content, not for the number, and test it before relying on it.
Should I use a hardware or software encoder?
Use a hardware encoder if your computer supports one, such as NVENC on a supported NVIDIA card, Quick Sync on a supported Intel processor, or the Apple hardware encoder on a Mac, because it usually leaves more processor capacity free. Software encoding can look very good on a powerful processor, but it competes with your game and other programs, so test both if you are unsure.
Why does my stream look blurry even at 1080p?
A blurry or blocky picture at high resolution usually means the bitrate is too low for that resolution, so each frame gets too little data. Raise the bitrate a little, or lower the output resolution so the available bitrate goes further. Fast-moving content needs more bitrate than a static talk at the same resolution, so check the bitrate ranges in our OBS bitrate guide.
Conclusion
The best OBS streaming settings are the ones that stay stable for your whole broadcast, not the highest numbers on the screen. Start at 720p and 30 frames per second, use a hardware encoder if your computer supports one, choose a bitrate comfortably below your upload speed, and test for at least ten minutes before you go live. Raise one setting at a time, save the setups that work as named OBS profiles for different kinds of content, and keep notes on what changed and what it did. That slow, tested approach beats copying someone else’s numbers, because their hardware, connection and content are not yours. With a stable starting point and a habit of testing, you can improve your stream gradually, a sharper picture here, smoother motion there, without ever risking a broadcast on settings you have not verified. The goal is a stream viewers can watch without thinking about the settings at all.